Node.js 安装
官网最新版本
访问 Node.js 官网下载最新的版本(LTS长期支持版本)

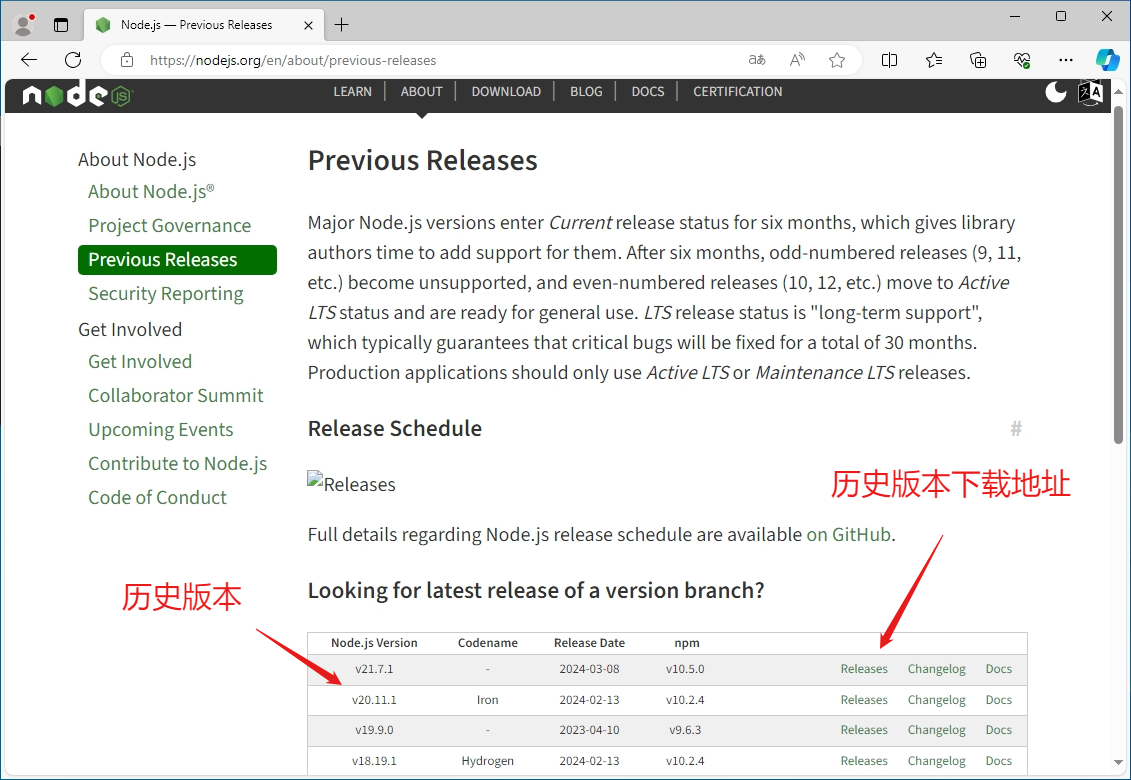
历史版本
下载 Node.js 历史版本

安装 Node.js
视频版本 Node.js 安装步骤
Node.js安装
1.访问官网(https://nodejs.org/en)
2.历史版本(https://nodejs.org/en/about/previous-releases)
3.官网下载慢使用国内镜像(https://npmmirror.com/)
全局安装 Yarn
1.Yarn v1 官网(https://classic.yarnpkg.com/en/)
2.全局安装命令
npm install -g yarn
全局安装 pnpm
1.pnpm官网(https://pnpm.io/zh/)
2.全局安装命令
npm install -g pnpm
全局设置镜像
1.查看官方镜像
npm config get registry
https://registry.npmjs.org/
yarn config get registry
https://registry.yarnpkg.com
pnpm config get registry
https://registry.npmjs.org/
2.设置国内镜像
npm config set registry https://registry.npmmirror.com
设置完成使用 npm config get registry 查看设置结果
yarn config set registry https://registry.npmmirror.com
设置完成使用 yarn config get registry 查看设置结果
pnpm config set registry https://registry.npmmirror.com
设置完成使用 pnpm config get registry 查看设置结果
临时设置镜像
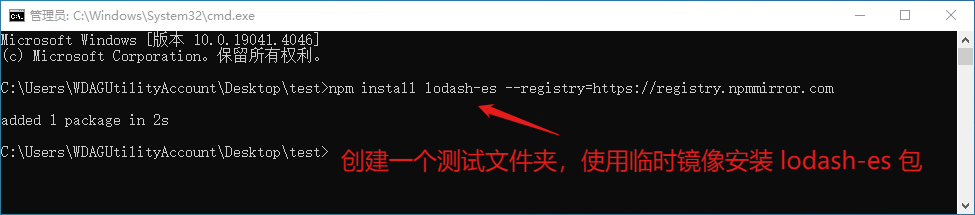
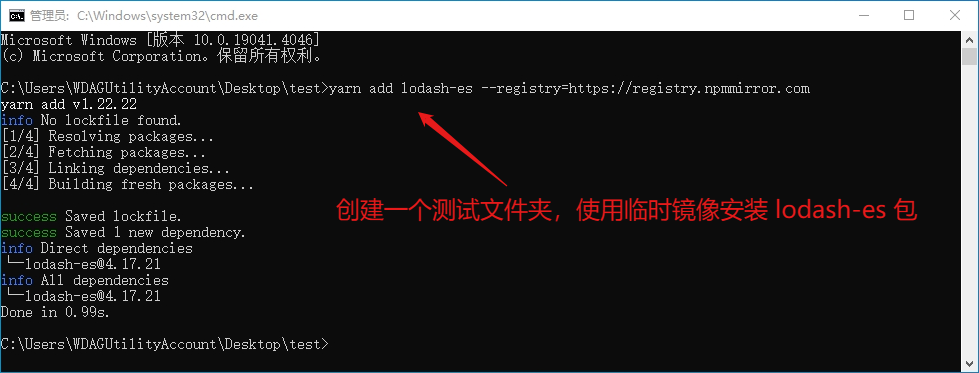
1.使用临时镜像安装 lodash-es 包
npm install lodash-es --registry=https://registry.npmmirror.com
yarn add lodash-es --registry=https://registry.npmmirror.com
pnpm add lodash-es --registry=https://registry.npmmirror.com
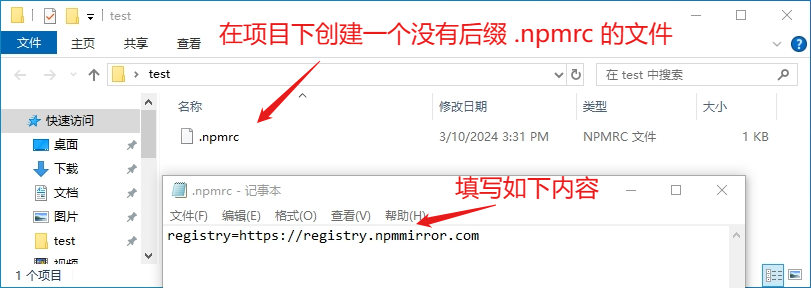
项目中设置镜像
1.在项目根目录下创建 .npmrc (没有后缀) 文件,内容为
registry=https://registry.npmmirror.com
设置后可以使用npm yarn pnpm 安装命令进行安装包,都会通过镜像下载
npm install lodash-es
yarn add lodash-es
pnpm add lodash-es
文档已经发布到 codecodego.com 域名,可以访问查看
结束
-
安装过程
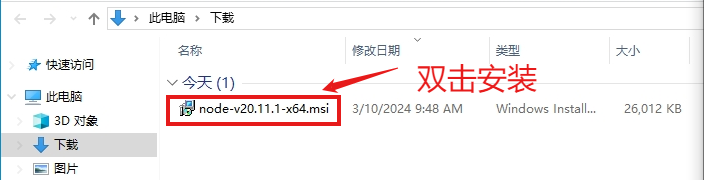
- 点击 Windows Installer 下载 node-v20.11.1-x64.msi。
- 下载完成 双击 node-v20.11.1-x64.msi 开始安装。
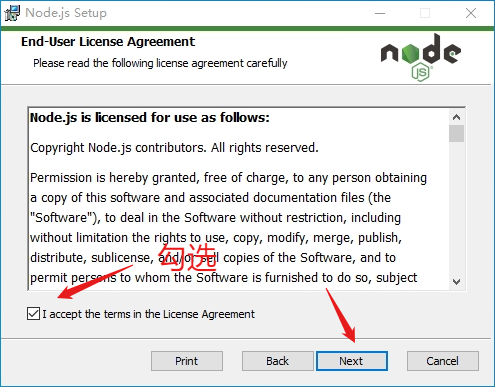
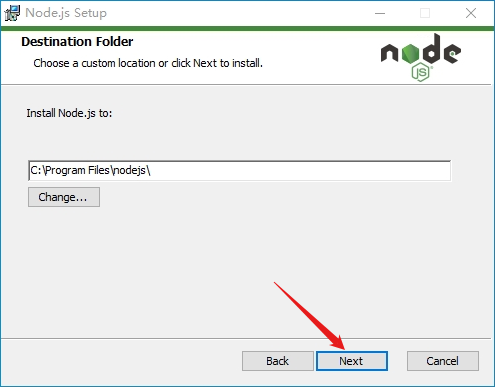
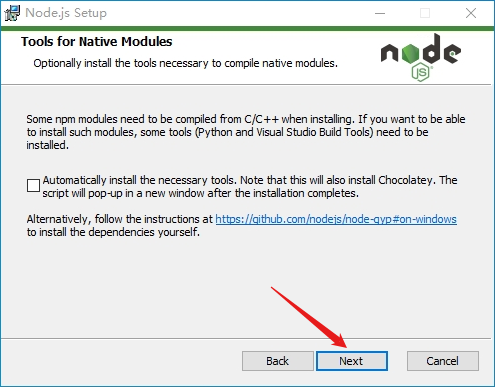
- 一路 Next,遇到
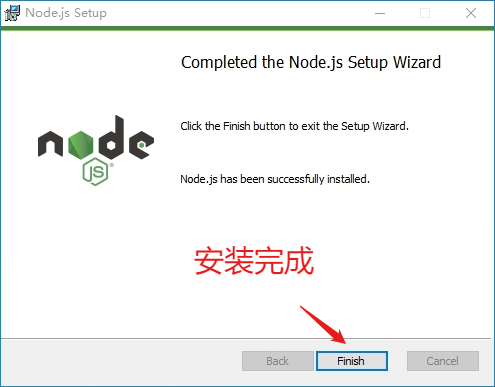
I accept the terms in the License Agreement勾选, 直到点击 Install 进行安装 - 遇到 Finish 点击安装结束
-
验证安装
- Win + R 输入 cmd 打开命令提示符窗口。
- 在命令提示输入 node -v ,如果出现 v20.11.1 则代表安装成功了
# 查看 Node.js 版本
C:\Users\WDAGUtilityAccount> node -v
v20.11.1

# 查看 npm 包管理器的版本
C:\Users\WDAGUtilityAccount> npm -v
10.2.4

# 查看 npm 包官方镜像地址
C:\Users\WDAGUtilityAccount> npm config get registry
https://registry.npmjs.org/
安装过程图解
- 点击 Windows Installer 下载 node-v20.11.1-x64.msi。

- 下载完成 双击 node-v20.11.1-x64.msi 开始安装。
- 一路 Next,遇到
I accept the terms in the License Agreement勾选, 直到点击 Install 进行安装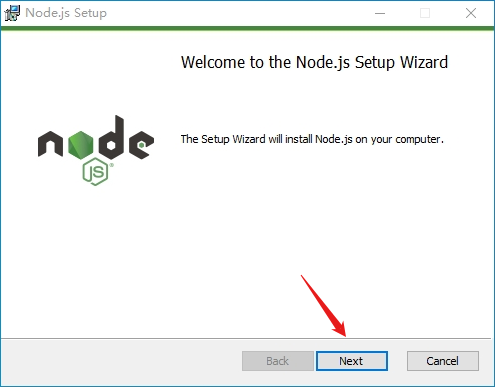


- 安装结束 Finish。
验证安装图解
-
Win + R 输入 cmd 打开命令提示符窗口。

-
在命令提示输入 node -v ,如果出现 v20.11.1 则代表安装成功了

安装包管理器
全局安装
Yarn v1 官网
Yarn 最新版本 官网
pnpm 官网
# 全局安装 Yarn
C:\Users\WDAGUtilityAccount> npm install -g yarn

# 全局安装 pnpm
C:\Users\WDAGUtilityAccount> npm install -g pnpm
全局卸载
# 全局卸载 Yarn
C:\Users\WDAGUtilityAccount> npm uninstall -g yarn

# 全局卸载 pnpm
C:\Users\WDAGUtilityAccount> npm uninstall -g pnpm
全局安装、卸载图解
-
全局安装 Yarn

-
全局卸载 pnpm

设置 npm 包国内镜像
全局设置
- npm
- Yarn
- pnpm
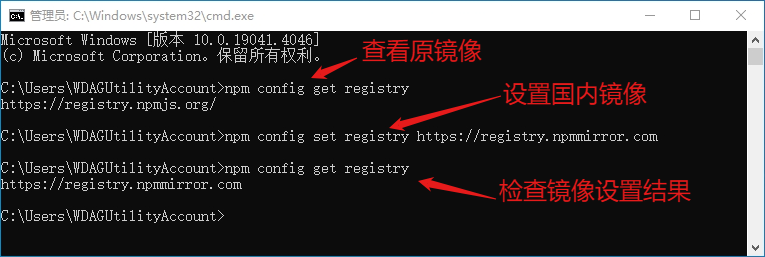
# 查看原镜像
C:\Users\WDAGUtilityAccount> npm config get registry
https://registry.npmjs.org/

# 设置国内镜像
C:\Users\WDAGUtilityAccount> npm config set registry https://registry.npmmirror.com

# 检查镜像设置结果
C:\Users\WDAGUtilityAccount> npm config get registry
https://registry.npmmirror.com
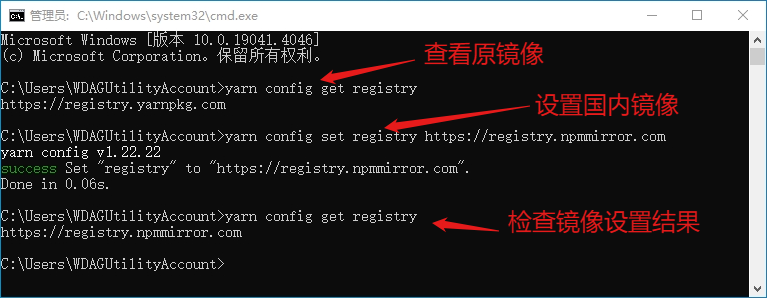
# 查看原镜像
C:\Users\WDAGUtilityAccount> yarn config get registry
https://registry.yarnpkg.com

# 设置国内镜像
C:\Users\WDAGUtilityAccount> yarn config set registry https://registry.npmmirror.com

# 检查镜像设置结果
C:\Users\WDAGUtilityAccount> yarn config get registry
https://registry.npmmirror.com
# 查看原镜像
C:\Users\WDAGUtilityAccount> pnpm config get registry
https://registry.npmjs.org/

# 设置国内镜像
C:\Users\WDAGUtilityAccount> pnpm config set registry https://registry.npmmirror.com

# 检查镜像设置结果
C:\Users\WDAGUtilityAccount> pnpm config get registry
https://registry.npmmirror.com

临时使用设置
- npm
- Yarn
- pnpm
$ npm install lodash-es --registry=https://registry.npmmirror.com
yarn add lodash-es --registry=https://registry.npmmirror.com
pnpm add lodash-es --registry=https://registry.npmmirror.com

项目中设置
- 项目根目录下创建一个没有后缀的 .npmrc 文件,并在其中添加以下代码:
.npmrc
registry=https://registry.npmmirror.com